Ultimate Blackberry Crumb Bars: A Foolproof 3-Step Recipe
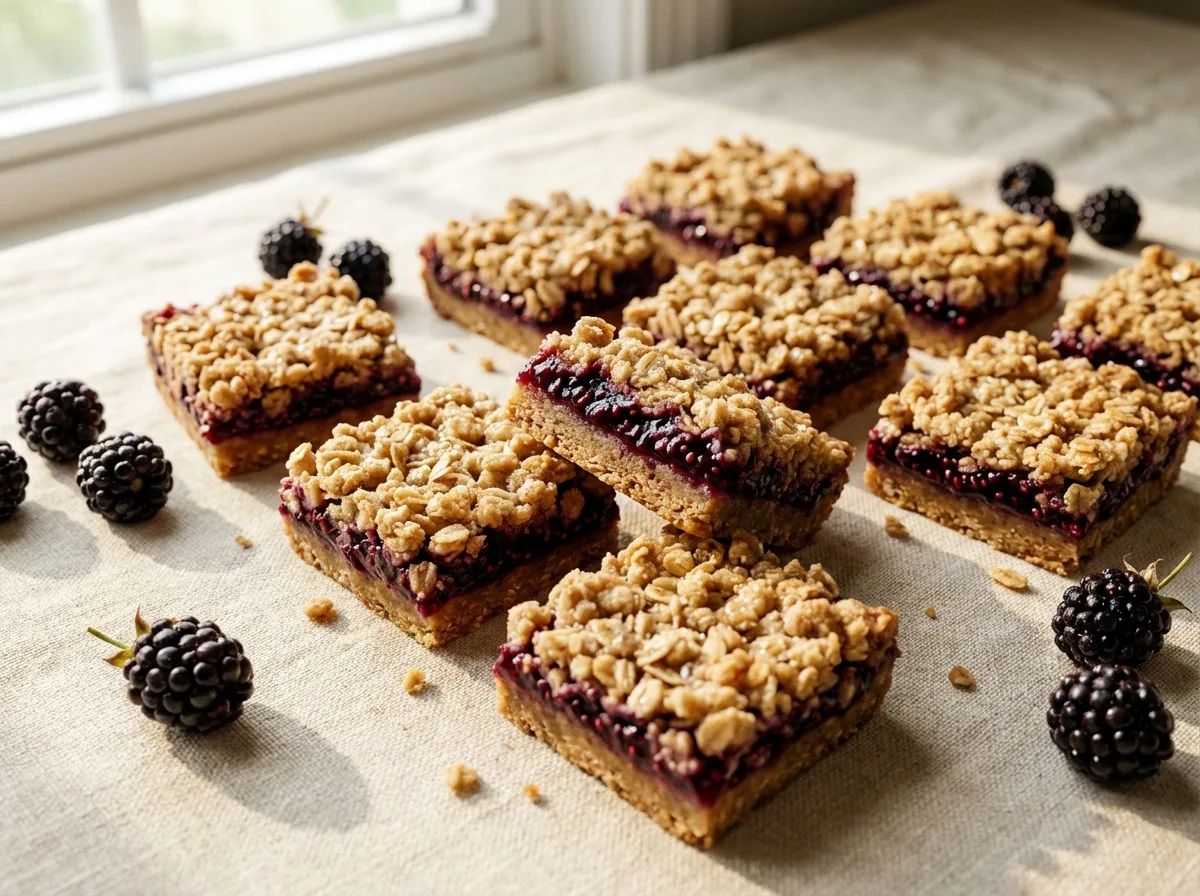
Imagine a buttery, crunchy oat crumble giving way to a warm, jammy river of sweet-tart blackberries. That’s the magic we’re baking today, and it is absolutely irresistible.
Welcome to what I am confident will become your new favorite go-to dessert recipe. These Blackberry Crumb Bars are the perfect symphony of textures and flavors. We start with a ridiculously simple, press-in crust made from wholesome gluten-free oats and buttery brown sugar. Then comes the star of the show: a vibrant, luscious blackberry filling, simmered just enough to become glossy and thick, with a zesty hint of lemon to make the flavor pop. It’s all crowned with a generous layer of that same addictive, crunchy crumble. It’s heaven in a baking dish.
Whether you call them crumb bars, crumble bars, or oat bars, the appeal is universal. They capture the essence of a fruit crisp or a blackberry pie but in a much simpler, more portable form. They’re sturdy enough for a picnic basket, yet elegant enough to serve warm with a scoop of vanilla ice cream for a stunning dinner party dessert. The contrast between the rich, buttery, golden-brown crumble and the sweet, slightly tart, gooey berry layer is what makes every single bite a moment of pure bliss.
Why You’ll Love This Recipe
- ✓
Incredibly Easy to Make: The crust and crumble topping are made from the exact same mixture, cutting your prep time in half. No special equipment needed!
- ✓
Perfect Texture Combination: Get ready for a sensory delight—a crunchy, buttery oat crust, a gooey, vibrant berry filling, and a crispy crumble topping all in one bite.
- ✓
Versatile and Crowd-Pleasing: This is the ultimate potluck hero. It’s perfect for summer picnics, holiday gatherings, or simply as a comforting dessert with a scoop of vanilla ice cream.
- ✓
Gluten-Free Goodness: Thoughtfully crafted with gluten-free oats and flour, this recipe ensures that everyone, regardless of dietary needs, can enjoy this scrumptious treat without compromise. For more oat-based inspiration, check out our Banana Oat Cottage Cheese Muffins.
- ✓
Customizable to Your Liking: While blackberries are fantastic, this recipe is a perfect base for almost any fruit. Feel free to swap in blueberries, raspberries, peaches, or apples depending on the season.
This recipe holds a special place in my heart. It reminds me of late summer afternoons at my grandmother’s house. She had a sprawling, slightly wild garden with blackberry bushes that grew with reckless abandon. As kids, we’d spend hours picking them, our fingers stained a deep purple and our faces sticky with juice. The reward for our ‘hard work’ was always a pan of her famous crumb bars, filling the entire house with the warm, fragrant aroma of baked fruit and buttery oats. It was the smell of pure comfort and love.
My grandmother’s version was rustic and wonderful, but I’ve spent years perfecting the ratios to create what I believe is the ultimate version. Many recipes result in a soggy bottom crust or a filling that’s too runny. Our secret weapon is pre-cooking the berry filling on the stovetop. This simple, extra step allows the cornstarch to activate fully, creating a thick, jammy filling that holds its shape beautifully when cut. It guarantees a perfectly crisp crust and a gooey, not watery, center. This scientific tweak is the key that elevates these simple bars into a truly foolproof and spectacular dessert.
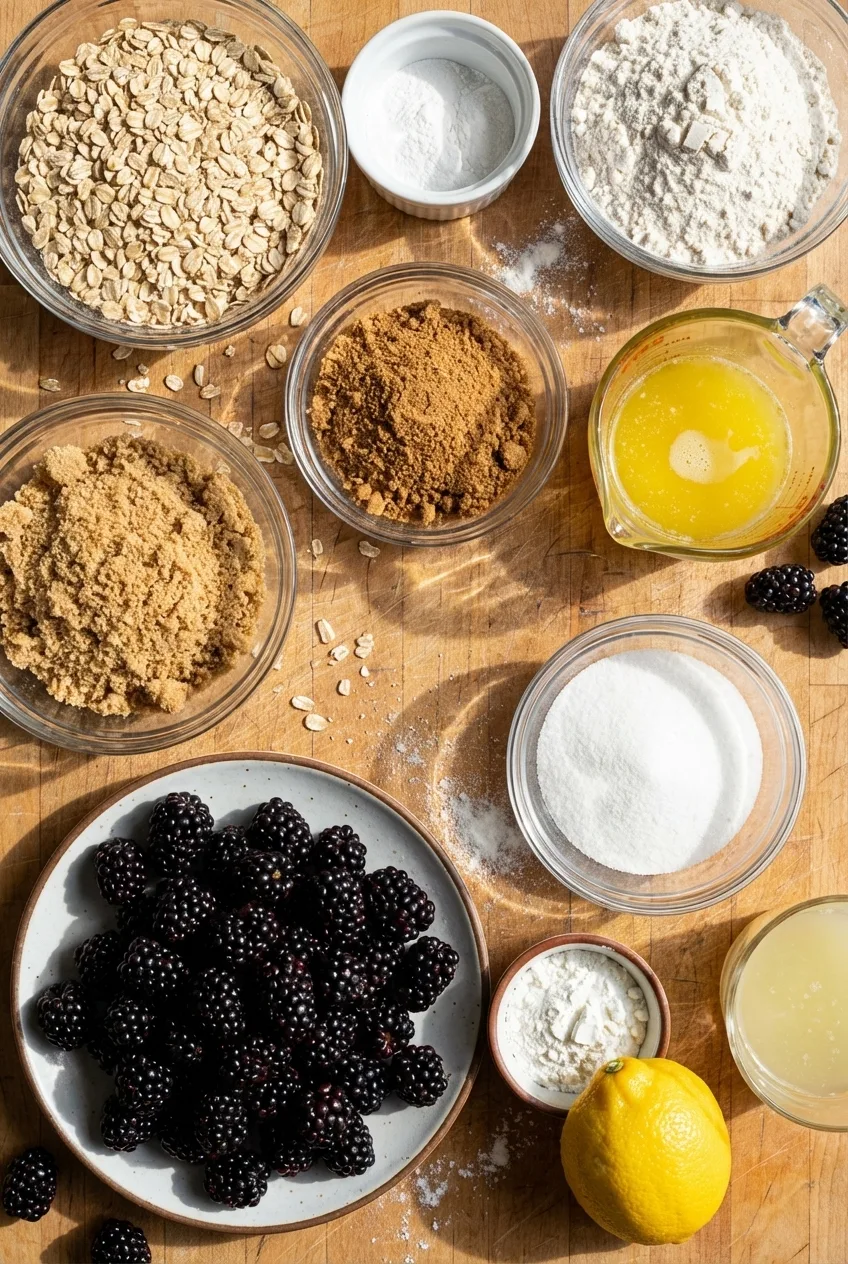
Ingredients for Perfect Blackberry Crumb Bars
The beauty of this recipe lies in its simplicity and the quality of its ingredients. We’re using pantry staples to create something truly special. Here’s a breakdown of what you’ll need and why each component is crucial for achieving crumb bar perfection.
For the Buttery Oat Crumble and Crust:
- Gluten-Free Oats: We use 2 cups of rolled gluten-free oats. Rolled oats, as opposed to quick oats, provide a much better texture—a satisfyingly chewy and hearty bite that stands up to the jammy filling. They toast beautifully in the oven, releasing a nutty, fragrant aroma.
- Gluten-Free Flour: 2 cups of a good quality gluten-free all-purpose flour blend provide the structure for the crumble. It binds with the butter and sugar to create both the sturdy base and the tender, crumbly topping.
- Brown Sugar: 2 cups of packed brown sugar are essential. The molasses content in brown sugar lends a wonderful moisture and a deep, caramel-like flavor that white sugar alone can’t replicate. It’s the secret to a rich, flavorful crumble.
- Melted Butter: 1 cup of melted unsalted butter is the magical ingredient that brings everything together. Melting the butter, rather than using it cold, ensures every particle of flour, sugar, and oats is evenly coated, resulting in a perfectly crisp crust and cohesive crumble.
- Baking Powder & Salt: 1 teaspoon of baking powder gives the crumble a slight lift, preventing it from becoming too dense. 1 teaspoon of salt is a non-negotiable flavor enhancer; it balances the sweetness of the sugar and berries, making all the other flavors shine brighter.
For the Luscious Blackberry Filling:
- Blackberries: The star of the show! You’ll need 4 cups of fresh or frozen blackberries. Their natural sweet-tart flavor is the perfect counterpoint to the rich crumble. If using frozen, there’s no need to thaw them first.
- Lemon Juice: The juice of 1 lemon is our flavor secret. The acidity doesn’t make the bars taste lemony; instead, it brightens and intensifies the natural flavor of the blackberries, cutting through the sweetness and adding a wonderful freshness.
- White Sugar: We use 1/4 cup of granulated white sugar here to let the pure fruit flavor take center stage. It provides just enough sweetness to complement the tartness of the berries.
- Cornstarch: 2 tablespoons of cornstarch is the key to a perfect, non-runny filling. As the filling simmers, the cornstarch gelatinizes, thickening the berry juices into a luscious, glossy syrup that will set beautifully as the bars cool.
How to Make Blackberry Crumb Bars: Step-by-Step
This recipe is a joy to make, broken down into three simple stages: creating the crumble mixture, cooking the vibrant berry filling, and finally, assembling and baking. Following these steps will guarantee a pan of perfect, golden-brown bars with a delightfully jammy center.
H3: Step 1: Prepare the Crumb Mixture and Crust
First things first, preheat your oven to 350°F (175°C). Lightly grease a 9×11 inch baking dish and line it with parchment paper, leaving some overhang on the sides. This overhang will act as a sling, making it incredibly easy to lift the bars out of the pan later. In a large mixing bowl, combine all the ingredients for the crumb layer: the gluten-free oats, gluten-free flour, brown sugar, baking powder, and salt. Whisk them together until they’re evenly distributed. Now, pour in the melted butter. Using a fork or your fingertips, mix everything together until the butter is fully incorporated and the mixture resembles coarse, wet sand. It should hold together when you press a small amount in your hand. This dual-purpose mixture is the key to the recipe’s simplicity!
H3: Step 2: Form the Crust
Take approximately half of the crumb mixture and press it firmly and evenly into the bottom of your prepared baking dish. I like to use the bottom of a measuring cup or a flat glass to pack it down tightly. This is a crucial step! The more compactly you press the crust, the sturdier your final bars will be, creating a solid foundation that won’t crumble when you cut into it. This firm base is what prevents the jammy filling from making the bottom soggy, ensuring a perfect crunch in every bite.
Watch How to Make This Recipe
Black Cat Kitchen shows you the exact technique.
H3: Step 3: Cook the Blackberry Filling
In a medium-sized saucepan, combine the 4 cups of blackberries, lemon juice, white sugar, and cornstarch. Stir everything together gently before placing it over medium-low heat. As the mixture heats up, the berries will start to release their fragrant juices. Continue to stir and simmer for about 10 minutes. You’ll witness a bit of kitchen science as the cornstarch activates, transforming the juices from a thin liquid into a beautifully thick, glossy, and smooth syrup that clings to the berries. This step is our secret to a perfect, sliceable bar.
H3: Step 4: Assemble and Bake to Golden Perfection
Pour the warm, thickened blackberry mixture evenly over the packed oat crust, spreading it gently with a spatula to reach the corners. Now, take the remaining half of the crumb mixture and sprinkle it evenly over the top of the berry layer. Don’t press this layer down; you want a rustic, crumbly texture. Bake for 45 minutes, or until the topping is a beautiful golden-brown and you can see the berry filling bubbling merrily around the edges. The aroma that will fill your kitchen is your reward!
Nutrition and Health Benefits
While these Blackberry Crumb Bars are certainly a treat, they also pack a surprising nutritional punch thanks to their wholesome ingredients. Blackberries themselves are the star, loaded with vitamins, fiber, and powerful antioxidants. According to Healthline, a single cup of blackberries contains a significant amount of your daily Vitamin C and Vitamin K needs, which are vital for immune function and bone health.
The other powerhouse ingredient here is the gluten-free oats. Oats are celebrated for their high content of a specific type of soluble fiber called beta-glucan. As noted by the Mayo Clinic Health System, this fiber can help lower cholesterol, improve gut health, and stabilize blood sugar levels. When preparing your berries, it’s always wise to follow food safety guidelines. The USDA recommends rinsing fresh fruit thoroughly to ensure it’s clean and safe to eat. By choosing this dessert, you’re enjoying a delicious treat that also offers some genuine benefits.
Nutritional Highlights
These bars offer a wonderful blend of fiber from oats and antioxidants from blackberries. The oats provide sustained energy release, while the blackberries deliver a boost of Vitamin C. It’s a more wholesome way to satisfy your sweet tooth, incorporating the heart-healthy benefits of soluble fiber and the immune-supporting properties of fresh fruit.
Storage and Make-Ahead Tips
To store, keep the completely cooled bars in an airtight container. They will stay fresh at room temperature for up to 3 days, or in the refrigerator for up to a week. For longer storage, you can freeze the bars for up to 3 months. Simply wrap them tightly in plastic wrap and then in foil. You can make the crumb mixture a day or two in advance and store it in an airtight container in the refrigerator to save on prep time.
Serving Suggestions
These Blackberry Crumb Bars are fantastic on their own, but they can also be dressed up for any occasion. For a truly decadent dessert, serve a slightly warmed bar with a generous scoop of high-quality vanilla bean ice cream. The contrast of the warm, jammy fruit and the cold, creamy ice cream is simply divine. For a lighter, breakfast-friendly option, serve a bar with a dollop of Greek yogurt and a sprinkle of fresh mint. The tanginess of the yogurt beautifully complements the sweetness of the bar.
These bars also pair wonderfully with other baked goods for a brunch spread. Imagine a platter with these beauties alongside our Banana Oat Cottage Cheese Muffins or a fresh stack of our Fluffy Pancakes Recipe topped with more berries. It’s a combination that’s sure to impress your guests and satisfy every craving.
Frequently Asked Questions
Can I use other berries for this crumb bar recipe?
Absolutely! This recipe is wonderfully versatile. You can easily substitute blackberries with an equal amount of other berries like blueberries, raspberries, or even chopped strawberries. For a more complex flavor, a mixed berry combination works beautifully. Just be mindful that very tart berries might require a slight increase in sugar in the filling.
Can I use frozen blackberries instead of fresh?
Yes, frozen blackberries work perfectly in this recipe, and you don’t even need to thaw them first. When simmering the filling, you may need to add a few extra minutes to the cooking time to ensure the berries break down and the mixture thickens properly. The cornstarch will work its magic just the same to create that delicious, jammy consistency.
How do I know when the blackberry crumb bars are done baking?
You’ll know the bars are perfectly baked when the crumble topping is a beautiful golden-brown color. You should also see the blackberry filling bubbling gently around the edges of the pan. This indicates that the filling has reached a high enough temperature for the cornstarch to fully activate and thicken the juices.
Why are my bars falling apart when I cut them?
The most common reason for crumbly bars is not letting them cool completely before slicing. The melted butter and sugars in the crust and crumble need time to solidify as they cool, which binds everything together. For the cleanest cuts, allow the bars to cool at room temperature for at least 2-3 hours, or even chill them in the refrigerator for 30 minutes before cutting.
Can I make this recipe vegan?
Yes, you can easily adapt this recipe to be vegan. Simply substitute the dairy butter with your favorite plant-based butter or solid coconut oil. Ensure the brand you choose works well in baking for the best results. All other ingredients in the recipe are naturally plant-based, making this a simple and delicious vegan conversion.

A Sweet and Simple Masterpiece
These Blackberry Crumb Bars are more than just a dessert; they’re a celebration of texture and flavor, a perfect harmony of buttery, crunchy, and jammy. The process is as rewarding as the result—watching the simple ingredients transform into a golden-brown slab of pure joy is a baker’s delight. The sweet-tart burst of the blackberry filling, brightened by a hint of lemon, perfectly complements the rich, oaty crumble. It’s the kind of treat that feels special enough for a celebration but is simple enough to whip up on a whim for a cozy afternoon.
We truly believe this recipe will become a staple in your collection. It’s forgiving, endlessly adaptable, and a guaranteed crowd-pleaser. Whether you serve it warm with a scoop of melting vanilla ice cream or enjoy it as a portable snack on a picnic, it’s a recipe that creates smiles and happy memories. It’s a little slice of homemade heaven, and we can’t wait for you to experience it.
Have you tried this recipe? I would love to hear how it turned out — drop your experience in the comments below!
If you loved these bars, feel free to share this recipe with your friends and family on social media. Every share helps our community grow!
Pin this recipe for later


Ultimate Blackberry Crumb Bars
Ingredients
Method
- 1. Preheat your oven to 350°F (175°C). In a large mixing bowl, combine all ingredients for the crumb layers (oats, flour, brown sugar, melted butter, baking powder, salt).
- 2. Press half of the mixture firmly into a greased and parchment-lined 9×11 baking dish to form the crust.
- 3. In a medium saucepan, combine all ingredients for the berry layer. Mix well and simmer on low for 10 minutes until a thick, smooth syrup forms.
- 4. Pour the berry mixture over the oat crust and top with the remaining oat mixture.
- 5. Bake for 45 minutes until golden brown and bubbly.
- 6. Allow the bars to cool completely in the pan before cutting into 12 bars to ensure they set properly. Serving with vanilla ice cream is optional but highly encouraged!
Notes
Parchment Paper Sling: Use parchment paper with overhang on the sides of the pan. This makes it easy to lift the entire block of bars out for easy cutting.
Fruit Variations: This recipe works wonderfully with other fruits like blueberries, raspberries, or chopped peaches. Adjust sugar as needed based on the sweetness of your fruit.